How to set up microsoft office calendar [sop]
Updated: 07/09/2021
Article #: 151
Outlook Calendar is our Company Electronic appointment and work scheduler. We use Calendar to schedule the following:
- Internal Meetings
- Clients' Meetings
- Clients' Work
- Clients' Training & Advisory
- Time Off and Leave
Share your Calendar
The first time you log into MS Office Calendar you will need to share your calendar with the other Team Members
- Log into Office Calendar from the Practice Protect Portal
è MS Office Calendar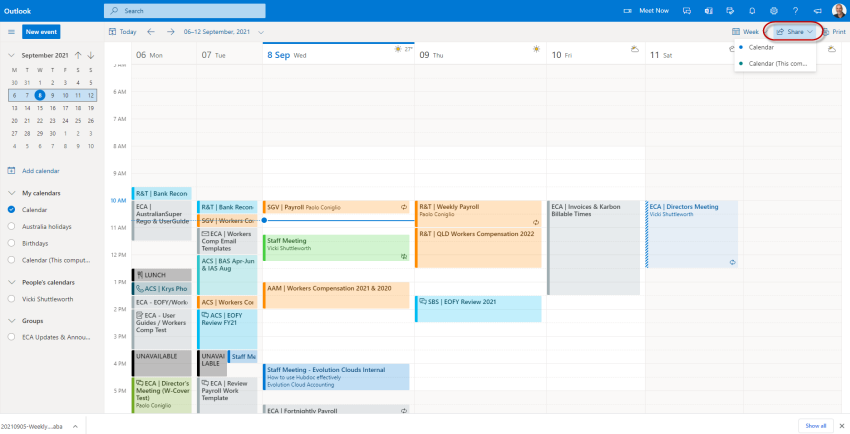
- Click on Share > Calendar
è The Sharing and permissions screen opens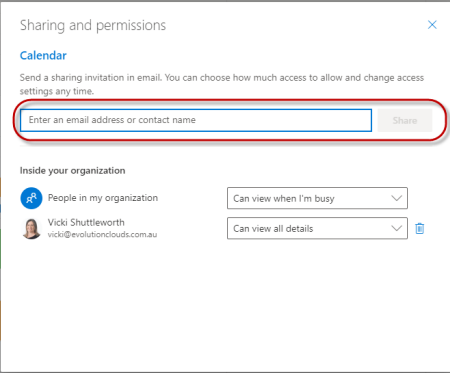
- Type the email address of one of your team members and click on [Share]
è The Sharing and permissions screen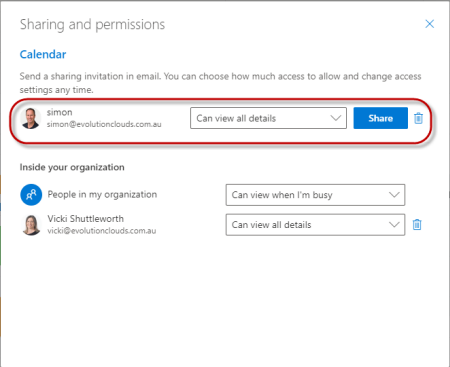
- Select the permission option: Can view all details
Note: this option will still allow you to book private appointments
è The Sharing and permissions screen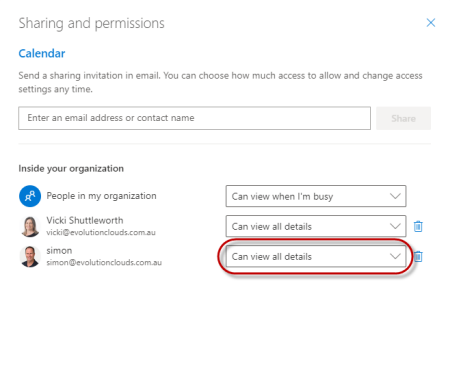
- Repeat the above steps to share your Calendar with all other Team Members
è Your Team member will receive an email request to accept the Calendar invite
- Once they click on [Accept and view calendar] their Calendar will be listed in your Office Calendar under the People's Calendar Heading
Note: the above steps will allow you to view other Team Members' calendars, for them to view your Calendar instead, they will need to send a share request to you.
Set up your Activity Categories
- From your Office Calendar, click on the Settings icon
 then at the bottom of the Settings Pane click on View all Outlook settings
è The Outlook Settings screen opens
- Click on the [General] Tab and then [Categories]
- Click on Create category
è The Create new category screen opens
- Type the Category Name and select the relevant colour
Note: hover the mouse on the colour palette and the colour name will display - Click on [Save]
- Repeat the above steps for all Categories
List of Categories
- BKP - Advanced > Dark Blue
- BKP - BAS/IAS > Light Teal
- BKP - Client Meetings > Steel Gray
- BKP - General Bookkeeping > Blue
- CNS - Training on site > Red
- CNS - Training Remote > Dark Red
- INT - L&D On Site > Dark Olive
- INT - L&D Remote > Dark Teal
- PAY - EOPY > Dark Orange
- PAY - Payroll > Orange
- PAY - Superannuation > Peach
- PVT - Personal Appt > Dark Purple
- PVT - Time Off/Leave > Dark Magenta
- SUP - Support Desk > Yellow
- SUP - Support Work > Dark Yellow
Create Calendar views
Once your Team Members have accepted your share calendar requests, you can then view their calendars.
- To view one or more Team Members' Calendar on your Office Calendar, go to People's calendars and click on their names
Note: the calendars will show left to right in the order that you have selected each of your Team Members - You can then choose a number of Calendar View options:
- Split or Merged > Split shows a calendar column for each team member, merged shows one calendar with all Team Members' appointments overlapping
- Period > You can choose between: Day, Week, Work Week or Month
- Once you have set a view suitable to your work preferences, you can save it as a Custom View
è MS Office Calendar
- Click on the current view (i.e. Week) and select the period and view type
- Click on Save current view
è The Save current view screen opens
- Give a name to the new Custom View and click on [Save]
è The new Custom View is listed under the Period options - You can now switch from one view to another
|
Rate this Topic:
|
|||
|