Every Staff Member requires a free Zoom Meetings Account for 1-1 Client Meetings and Training sessions and a Zoom Phone license and Extension.
Before adding a User to Zoom Phones, you will need to check if a spare Zoom Phone license seat and phone line are available in the ECA Zoom account.
If the Zoom Phones ECA currently does not have a spare license seat, when creating a new User Zoom will prompt the purchase of a new license.
However, if a spare license is available, this license should also have a Direct Phone Number assigned which can be re-assigned to the new user.
Create a new Zoom Meetings Account
- Log into the Zoom - ECA account from Practice Protect
- Select the [User Management] > [Users] Tab
è The Zoom Users screen opens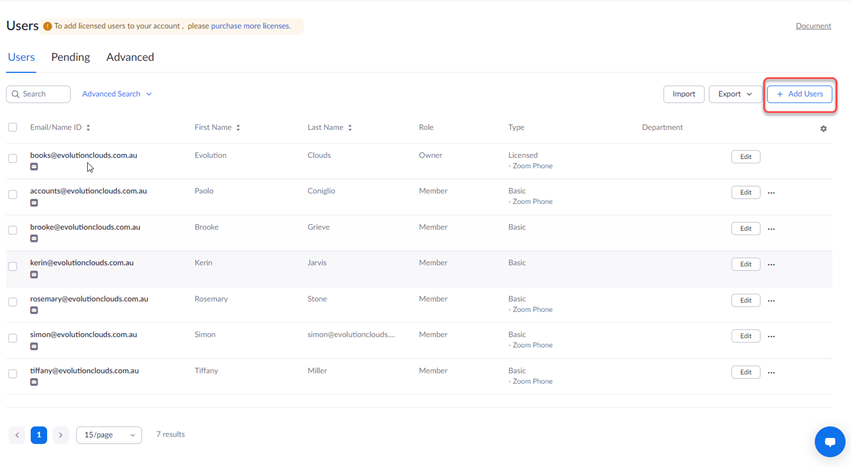
- Click on [Add Users]
è The Zoom Add Users screen opens
- Type the new Staff Member's email address
- In User Type, select Basic and then select the license: Meeting Basic
- Type the Staff Member's Job Title and Location and click on [Add]
è Zoom will send an activation email to the new Staff Member's email address and the User will show as Pending until the Account is confirmed
Create a New Zoom Account
- Log into the new Staff Member's email address and open the Zoom Activation email
è The Zoom activation email
- Click on [Activate Your Zoom Account]
è The Activate your Zoom Account screen opens
- Click on Sign Up with a Password
è The Welcome to Zoom screen opens
- Type the new Staff Member's first and last name
- Create a password by following the Zoom's Password rules
- Click on [Continue]
Link a User to a Zoom Phones' License Seat
- From the Zoom ECA account, Select the [Phone System Management] > [Users & Rooms] Tab
è The Zoom Phone System Management - Users screen opens
- Click on [Add]
è The Add User screen opens
- Click on Choose
è The Choose From User screen opens
- Select the new Staff Member and click on [Confirm]
- Click on Assign
è The Assign Packages screen opens
- Select the package: AU/NZ Unlimited Calling Plan
- Click on [Confirm and Assign Numbers]
è The Assign Numbers screen opens
- Select one of the phone numbers from the list and click on [Confirm]
- Click on [Save]
è The new User is added to the Users & Rooms screen and a confirmation email is sent to the user
Configure the new user's Zoom Phone Account
Create the Absence and Busy Greetings
- Select the [Phone] Tab
- Go to the [Settings] Tab
- Scroll down to Greeting & Leave voicemail instruction and click on Audio Library
è The Audio Library screen opens - Scroll down to the bottom of the Audio Library and click on Add Audio
è The Add Audio pop-up screen opens
- Select/Enter the following details
- Audio Name > Type either Busy - #stafffirstname or Unavailable - #stafffirstname depending on the message type
- Voice > Select: American English | Salli-Female or American English | Matthew-Male based on the staff member's gender
- Message to play:
- Copy and paste either the Busy message or the Unavailable message from the following templates:
Busy Mailbox Message:
You have reached #stafffirstname's inbox.
#stafffirstname is currently on the phone or in a meeting.
If you wish to leave a message, please record your message after the tone.
Alternatively, you can email #stafffirstnameat #staffemail
Unavailable Mailbox Message
You have reached #stafffirstname's inbox.
#stafffirstname is available for Clients' enquiries #staffavailableday from #staffavailablehours.
If you have called outside of these hours, please leave a message after the tone.
If you have an urgent request, please email our support team at: support@evolutionclouds.com.au.
A Member of our team will attend to your request as soon as possible.Once again the email address is support@evolutionclouds.com.au. - Replace the red words with the correct staff's details
- Click on Play to check the message and make any punctuation changes as required
- Once you are happy with the recording, click on [Add]
- Repeat the same steps to create the second recorded Greeting
- Copy and paste either the Busy message or the Unavailable message from the following templates:
Configure Staff Member's Zoom Phone's Settings
- From the [User Management] > [Users] Tab, click on the new User
è The new User - Profile screen opens
- Edit the extension number to match the first three letters of the new Staff Member's first name and click on [Save]
- In Outbound Caller ID select: Main Company Number - (02) 7252 2066 (Australia) and click on [Save]
- Select the [Policy] Tab
è The new User - Policy screen opens
- Enable/Disable the following options
- Call Forwarding to External Numbers > Enabled
- Select Outbound Caller ID > Disabled
- Emergency Address Management > Disabled
- Emergency Calls to Public Safety Answering Points (PSAP) > Disabled
- Automatic Call Recording > Disabled
- Ad Hoc Call Recording > Enabled | Play a prompt to call participants when the recording has started > Enabled
- International Calling > Disabled
- Voicemail > Enabled | Allow voicemail transcription > Enabled
- Zoom Phone on Mobile > Enabled | Allow Calling and SMS/MMS function on Mobile > Enabled
- SMS > Enabled
- Call Overflow > Select: Can blind, warm or voicemail transfer to internal extensions... and external numbers
- Elevate Call to a Meeting > Enabled
- Call Park > Enabled
- Hand Off to Room > Enabled
- Mobile Switch to Carrier > Enabled
- Delegation > Enabled
- Select the [User Settings] Tab
è The new User - User Settings screen opens
- Select/Amend the following options:
- Business Hours > Edit the Business Hours as per the standard hours the new Staff Member is rostered to work
- Call Handling Ring Mode > Select: Sequential
- Ringing Duration for Each Device > Select: 30 seconds
- When a call is not answered > Select: Forward to voicemail
- Allow callers to reach an operator > Disabled
- Greetings & Leave voicemail instruction > Click on Audio Library and select the Busy Greeting for the new Staff Member
- Closed Hours
- Max Wait Time > Select: 30 seconds
- When a call is not answered > Select: Forward to voicemail
- Allow callers to reach an operator > Disabled
- Greetings & Leave voicemail instruction > Click on Audio Library and select the Unavailable Greeting for the new Staff Member
- Business Hours > Edit the Business Hours as per the standard hours the new Staff Member is rostered to work
- Leave all other Settings as Default
|
Rate this Topic:
|
|||
|