How to design the email signature for karbon [sop - onboarding]
Updated: 29/12/2021
Article #: 225
The email signature is customised for each Staff Member and is created as an image to upload to Karbon.
Cut the Staff Member Headshot to size
- Login into Pixlr Advanced Editor
- Click on [Open Image]
- Go to the Folder: Marketing > Team Headshots > Team - High Resolution and open the Team Member's headshot image
- Select the Crop Tool
è Cropping the Headshot image in Pixlr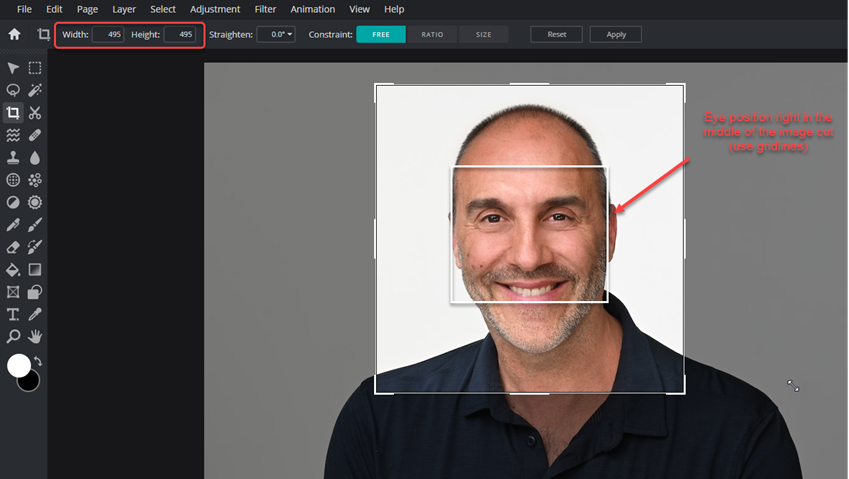
- Crop the image to a square headshot, making sure:
- The Width and Height are the same (to create a square image)
- that the eyes are right in the middle of the cropped area (use the gridlines for help)
- Click on [Apply]
- Save the Picture in the folder: Marketing > Team Headshots > Team - Cropped
- Select the Marquee select tool and select the ellipse shape
- Design a perfect circle in the centre of the face then go to Select > Invert Selection
- Hit the [DELETE] key then press [CTRL] + [D]
- Go to Page > Resize Page (scale)
- Change the Size to: 100 x 100 pxl
- Save the Picture in the folder: Marketing > Team Headshots > Team - Rounded Colour
- Click on Adjustment > Auto B&W
- Save the Picture in the folder: Marketing > Team Headshots > Team - B&W
Design the email signature
- In Pixlr click on File > Open Image
- Go to the folder: Marketing > Email Signatures and open the file: Email-Signature-AA-Template.pxz
è The Email Signature Template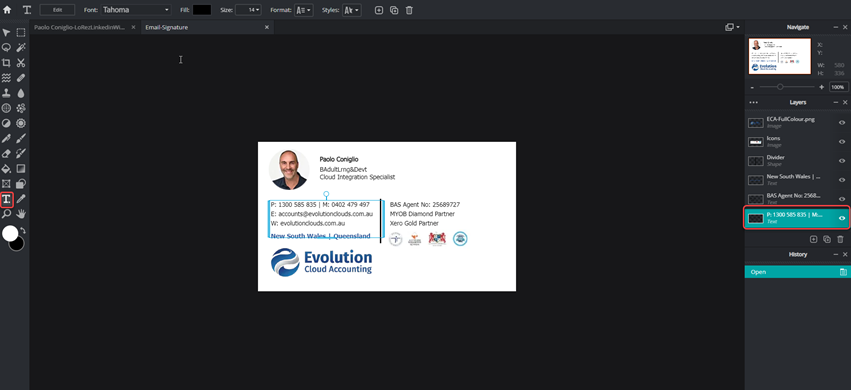
- Select the Text Tool
- Click on the Staff Member Name layer and change it to the new Staff Member's name, then click on Layer > Rasterize layer
- Click on the Job Title layer and change it to the new Staff Member, then click on Layer > Rasterize layer
- Click on the contact details layer and change the extension number and email address, then click on Layer > Rasterize layer
- Drag the rounded colour headshot from the folder: Marketing > Team Headshots > Team - Rounded Colour
- Set the size and position of the picture on top of the image on the template, then make the original image layer non-visible
- Click on Layer > Merge Visible and then Layer > Flatten Image
- Save the image as a jpg image in the folder Marketing > Email Signatures and name it: Email-Signature-#stafffirstname
|
Rate this Topic:
|
|||
|