How to set up kaspersky small office security [sop - onboarding]
Updated: 29/12/2021
Article #: 227
Kaspersky Small Office security includes a range of safety features to protect your computer from cyber-attacks. Most of the features are 'set and forget' and therefore require no ongoing work from Staff Members.
After Kaspersky is installed on your computer, you can then enable all the required protection settings.
Set Up Kaspersky
- Open Kaspersky Small Office Security
è Kaspersky Small Office Security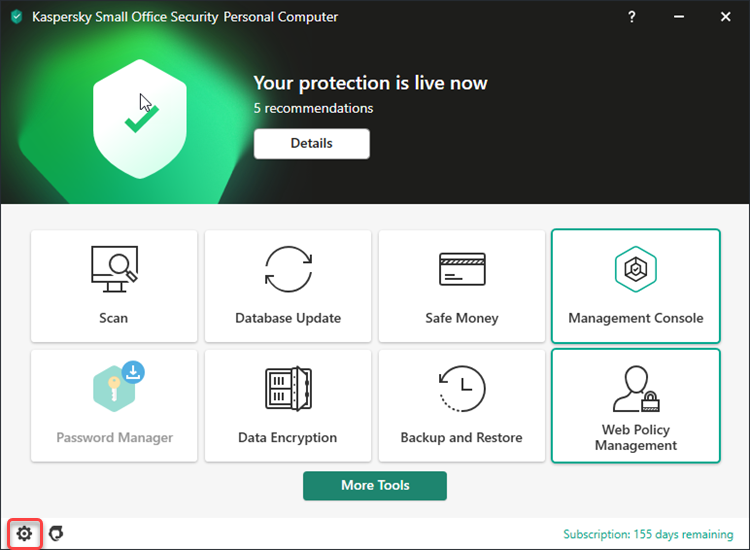
- Click on the Settings icon
 on the bottom left-hand side of the screen
è Kaspersky Settings screen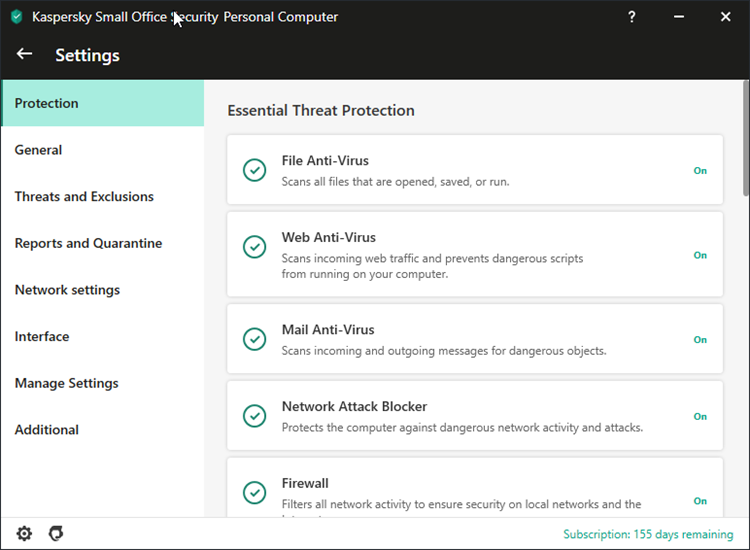
- Make sure the following options are set up on the various Tabs:
- Protection* > ensure sure all protection settings are enabled, apart from Safe Money
- General > ensure sure all protection settings are enabled, excluding Enable external device control
- Threats and Exclusions > ensure sure all protection settings are enabled
- Reports and Quarantine > leave settings as default
- Network settings > leave settings as default
- Interface > Disable all options in News Notifications, Promotional materials and Password Protection
Set up Anti Spam Settings*
- In the Settings > Protection Tab scroll down and click on Anti-Spam
è The Anti-spam settings screen is displayed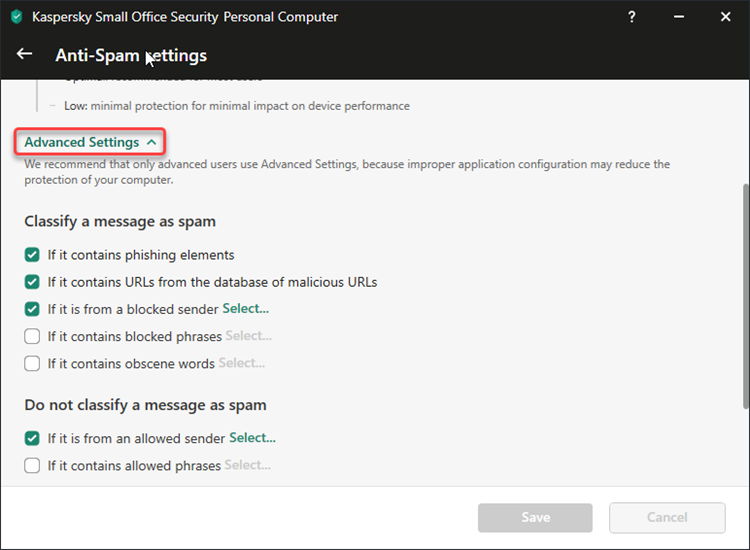
- Click on Advanced Settings
- Go to the section Classify a message as spam and enable the option: if it contains obscene words
- Go to the section Actions with messages and change the labels:
- Add Label [SPAM ALERT] to subject of messages classified as spam
- Add Label [SPAM RISK] to subject of messages classified as probable spam
- Click on [Save]
Set up Virus Scan
- Click on the Scan Tile
è The Scan screen is displayed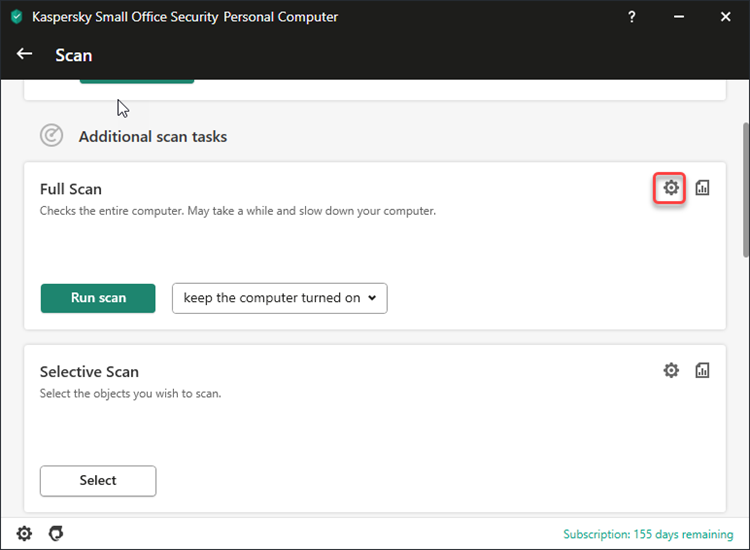
Full Virus Scan
- Scroll down to Full Scan and click on the settings icon

è The Full Scan settings screen is displayed - Click on Scan schedule
è The Full Scan Schedule pop up screen is displayed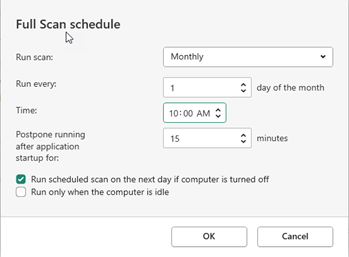
- Set the Full Scan schedule as follows:
- Run Scan > Select: Monthly
- Run every > Select: 1 day of the month
- Time > Select: 10:00 AM
- Postpone running after application startup for > Select: 15 minutes
- Run scheduled scan on the next day if computer is turned off > Select this option
- Run only when the computer is idle > Do not select this option
- Click on [OK] > [Save]
Vulnerability Scan
- Scroll down to Vulnerability Scan and click on the settings icon

è The Vulnerability Scan settings screen is displayed - Click on Search schedule
è The Vulnerability Scan Schedule pop up screen is displayed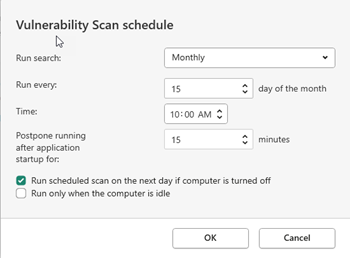
- Set the Vulnerability Scan schedule as follows:
- Run Scan > Select: Monthly
- Run every > Select: 15 day of the month
- Time > Select: 10:00 AM
- Postpone running after application startup for > Select: 15 minutes
- Run scheduled scan on the next day if computer is turned off > Select this option
- Run only when the computer is idle > Do not select this option
- Click on [OK] > [Save]
|
Rate this Topic:
|
|||
|
